Over the years I have spent a lot of time training science presenters. I’ve seen the best part of a full spectrum: Those calm cucumbers who get up on stage without a second thought, and those who are virtually paralysed with fear. Every time.
I have learned that you can’t always tell the latter from the former with any real degree of accuracy until there are just the two of you in rehearsal before an audience walks in the door. Sometimes the cool ones crumble.
Today, I spent some time in our theatre with a new recruit who will soon start treading the boards for herself. When I started describing the different techniques to keep the jitters in check, perhaps even turn them into a positive force, she told me about this recently uploaded TED talk.
That’s one, mighty clever way to put a positive spin on stage fright.
We can talk about maths here, right? Well hey, I guess it’s me that makes the rules, so: yes, we can talk about maths here.
http://www.youtube.com/watch?v=FeVysczKR_k
You’ll have to crank up the volume, but it’s worth it: Katie Steckles‘ description of group theory and Rubik’s Cubes is as good as any I’ve seen. Better, in fact, in that for the first time in 30 years of cubing I think I understood it this time.
…and believing you understand something is the same as understanding it, yes? Oh no, wait: this site draws the line at philosophy. Drat.
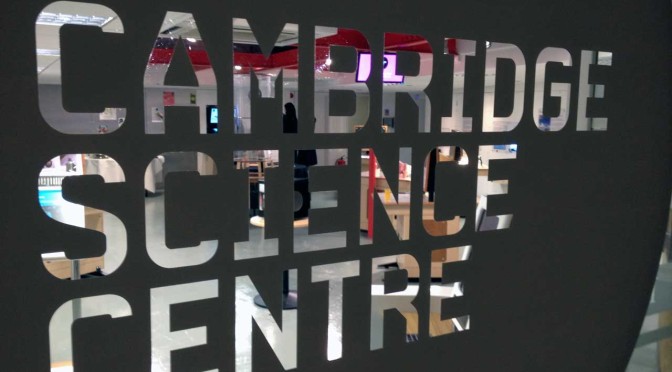
I’m a bit of a fan of the Cambridge Science Centre, and of the people behind it. A year ago I trekked down from Newcastle to help them fix things up just before they opened. So by ‘fan’ I mean ‘groupie.’
Hence, my favourite parts of this film are Chris Lennard saying ‘Heath-Robinson‘ rather than ‘Rube Goldberg‘ (quite right too), and the brief glimpse at the end of the inimitable Dave Ansell leaning in to blow out a candle. Lovely people all.
My biggest problem with Heath Robinson machines is that they’re impossible to photograph unless they’re designed specifically for the camera. And the only people to have done that, really, are the folks behind the magnificent Japanese children’s series Pitagora Suichi, whose mechanisms are unbelievably smart:
http://www.youtube.com/watch?v=HSf-3gwHPZA
(check this playlist for a bunch more from the same source.)
I suspect many of you who watch the above video will know exactly how it’s done but it’s not immediately apparent to everyone, especially if you choose to present it in a way that isn’t quite honest about what’s going on.
I use this demo in my teaching to introduce the idea that an object will topple over if the line of action of its weight lies outside its base. I usually present it as a challenge: I start off with two identical (apparently) empty drink cans on my desk (yes, I know the ones in the video have slightly different designs). I offer one of the cans to a student and challenge him or her to balance it on the edge of the base. I tell them I’ll try to do the same with the other can. I make a big show of concentrating, then reveal that I have managed to make my can balance while the student’s can keeps falling over (this usually gets a gasp of approval – as I think the video shows, the can balanced on its edge looks quite disconcerting). After the initial surprise at my being able to balance the can, the students usually guess that something’s not quite right.
I think this demo works well presented as a “magic trick” because it captures students’ attention and provokes the question “what’s going on?” or “how does that work?” and that’s when the discussion begins…
UPDATE: I’ve had a couple of responses to this post on Twitter and elsewhere. I should perhaps have said that using this type of approach may not be suitable for all teachers – you have to be comfortable with the way you present a demo to a class and if showmanship isn’t your thing there’s no point forcing it (although I’d argue that this particular demo requires very little in the way of showmanship to present as a “magic” trick). We touch on this issue in our forthcoming film Demo: The Movie.
A teacher contacted me saying it was a shame I didn’t provide an explanation as it would make it easier for teachers to do the demo if they knew exactly how to do it. So, here’s the trick: place a little water in the can you want to balance before your lesson. The easiest way to judge the correct amount of water is to hold the can in the balanced position then pour water into the can until you feel it just balances. Alternatively, you could pour in liquid wax and let that set so that you have a pre-prepared can that you can keep in the equipment cupboard.
This is the second Biology film we’ve made as part of the “Get, Set, Demonstrate” project. One of the films we were asked to look at was “Making Poo: The Digestive System” but we felt that this was not what we would strictly call a “demonstration” of digestion (since no actual digestion takes place), but rather an illustration of the process. Instead, we chose to make a film about using Visking tubing to model digestion and use it to explore the reasons why you might choose to carry out a demonstration of an activity which can be (and often is) done as a class practical.
This film was produced for the Get Set Demonstrate project. Click through for teaching notes, and take the pledge to perform a demonstration to your students on Demo Day, 20th March 2014.
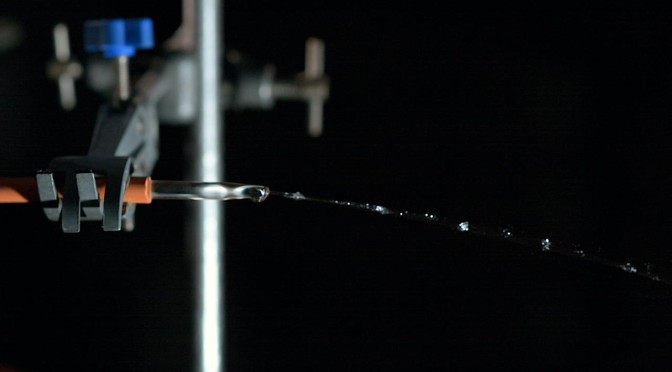
This is an example of a demonstration where video doesn’t come close to capturing the awesomeness of seeing it for real. I love seeing students have the same reaction to it as I did when I first saw it – one of joyful wonder at seeing something which appears to defy the laws of physics, of seeing something impossible.
Pearls in air can be a tricky demonstration to set up and I have to confess that, until making this film, I’d never had to set it up myself as I’ve always worked in schools where the physics technician did it for me. The version shown in the video isn’t perfect – it’s possible to get a better looking stream of “pearls”, but I’m OK with that because it’s honest in its depiction of what can be achieved in a limited amount of time with limited resources.
I find this demo incredibly useful for teaching about projectile motion and it’s a nice companion to the monkey and hunter demo which I think was the first demo film Jonathan and I made together.
This film was produced for the Get Set Demonstrate project. Click through for teaching notes, and take the pledge to perform a demonstration to your students on Demo Day, 20th March 2014.
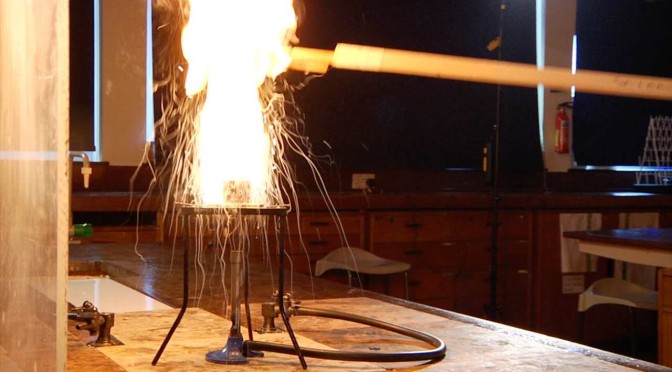
No other film in this series provoked more discussion and argument than this. Mostly from me. It’s a classic demo and was highly-requested in the nomination stage of Get Set Demonstrate, yet I argued against filming it.
For many years I made essentially all the science programmes that went out during the UK’s teatime ‘children’s television’ window, and there were only a few demonstrations I flat-out refused to show. This was one of them. You can show a safe method, you can treat the science with due respect… but with video you have precious little knowledge of your audience. You can’t tell when their attention has drifted away and they’ve maybe missed a crucial detail, you can’t be 100% certain of the message they take home, and most importantly you can’t guess what they might be tempted to try for themselves.
In person, the heat from the fireball is impressive: on video, it’s the size of your TV, or a YouTube window, or your phone. And it’s cold.
Film-makers can’t be responsible for the behaviour of their audience (discuss, 20 marks), but in this case the risk is very, very high. If 100,000 children saw the demo in our show, and 1 in 1,000 tried it themselves, and 1 in 100 set the curtains alight… that’s not something I ever wanted on my conscience. It’s not that the demo is too dangerous, it’s that it’s too easy. It’s trivial to perform it yourself in a kitchen, and the results can (and will) be catastrophic. So I never filmed the demo. Until now.
Others on the team eventually convinced me, using effectively the same argument applied backwards. The demo is straightforward to reproduce, and reproducing it is dangerous. Knowing that – understanding how and why oil fires are dangerous – might just save someone’s life, and for that reason alone, the team argued, this demo should be known and used in schools, and hence we should make this film.
I’m glad we did.
Three quick notes:
In a UK school, follow the CLEAPSS guidance (Scotland: SSERC). As a teacher or technician you should consult CLEAPSS as a matter of routine before attempting hazardous activities, and where they issue standard guidance (as here): follow it. ScienceDemo.org doesn’t have access to the CLEAPSS archive so we can’t link directly to the resource, sorry, but you’ll find it easily enough.
The formal government advice on how to react to a chip pan fire in the home is: get out, stay out, and call 999. It’s no longer considered appropriate to attempt the ‘damp tea-towel’ remedy yourself: the casualty rate is too high. We should have mentioned this in the film.
In person, our fires were a little underwhelming, with the water often putting the flame out quickly. We’ve cut around that for the film, but speaking to other demonstrators subsequently it seems we were probably more assiduous than strictly necessary about turning the gas off the instant the flame caught. Give it a few more seconds and you’ll get a more satisfying fireball, we’re told. Do see Bob Worley’s comment below about one-upmanship, however!
This film was produced for the Get Set Demonstrate project. Click through for teaching notes, and take the pledge to perform a demonstration to your students on Demo Day, 20th March 2014.
As a Physics teacher, I’ve got a long list of classic demonstrations at my disposal for use in teaching everything from pressure to electricity to conservation of energy. I’ve had to teach some Biology in the past and I think it’s fair to say that Biologists are not so well resourced when it comes to demonstrations.
A large part of the reason for doing demonstrations in class, I think, is to get our students to look closely at the world, to really observe it in detail. In Biology, that means taking a close look at living things and the components of which they’re made. This video is unlike any of the other demonstration films we’ve made so far, but it was one of the most interesting I’ve worked on – I came away convinced that if I teach Biology again, I’d definitely make more use of dissection as a teaching tool.
This film was produced for the Get Set Demonstrate project. Click through for teaching notes, and take the pledge to perform a demonstration to your students on Demo Day, 20th March 2014.
The collapsing can demo is one I loved seeing for the first time when I was at school, although my teacher used a tin with a screwed down lid which took a little more time to cool down. In some ways I prefer the version using a can with a screw lid because the additional waiting time makes for an even more dramatic “collapse”. Doing the demo with a drink can is of course far cheaper (and I think, more reliable as it doesn’t depend on the lid being screwed down properly) and I suspect this is why the approach we use in our video has become far more widespread in schools.
I like the demo a lot but, as I hope we’ve managed to convey in the video, I think we need to be careful how and why we use it in our lessons. This is a really fantastic demo for using the Predict, Observe, Explain (POE) approach as the explanation of what’s going on is not entirely straightforward – there are a couple of things relating to the behaviour of particles and the action of forces that need to be considered and this can lead to some really interesting discussion with students, providing they’re familiar with the relevant concepts.
We’ve suggested in our video that the collapsing can demo can be used in conjunction with another demo, as a way of “scaffolding” (I really hope I’ve used that term correctly – I think this may be the first time I’ve used it in writing in this context).
Once you’ve done the demo live in class, you’ve got the perfect justification for showing your students this video of a rather more spectacular demonstration of the same physics at work:
This film was produced for the Get Set Demonstrate project. Click through for teaching notes, and take the pledge to perform a demonstration to your students on Demo Day, 20th March 2014.
As well as being a science geek, I’m a magic geek. I’m not sure if anyone’s done the research on this, but I suspect those are two groups of people where there’s a significant overlap. I’ve got an entire live science show I do based around my love of magic and my somewhat lame attempts to become a magician and I include this demonstration as a highlight in the show. Like many of the demonstrations we’ve filmed, I don’t think video can do justice to how amazing it is to see in real life – it appears to be genuinely magical and always gets an “ooh” from the audience.
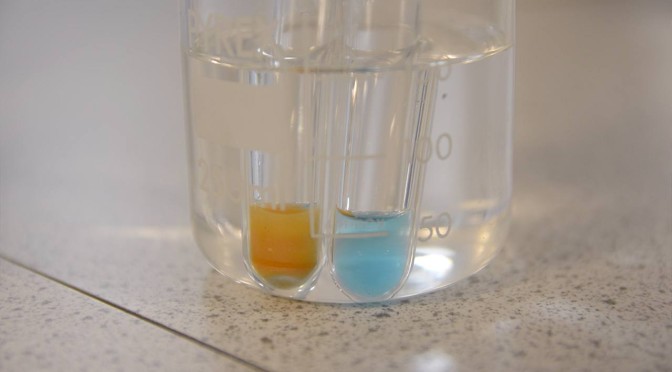
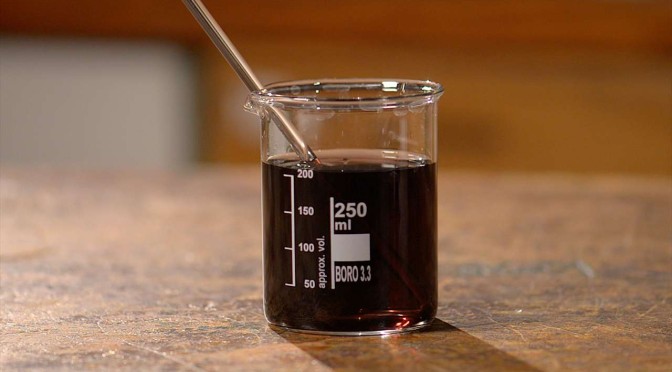
I’ve used the iodine clock in class purely for the effect it has of enthralling my students, but, as I hope the video shows, it can be used to achieve particular learning objectives. Mind you, I hope it’s clear that we at sciencedemo.org think “enthusing students” can be a sufficient justification for using a particular demo, if you’re going to take that enthusiasm and use it to help students get more out of your science lessons in general.
This film was produced for the Get Set Demonstrate project. Click through for teaching notes, and take the pledge to perform a demonstration to your students on Demo Day, 20th March 2014.