

Pick a random stall at Maker Faire UK and there’s a fair chance it’ll have flashing LEDs. And where there’s a flashing LED, there’s usually a little blue circuitboard driving it. The blue board is the famous Arduino, a family of open-source microcontrollers designed to allow easy interaction between code you write and real-world sensors and actuators.
There’s a complex and ever-expanding ecosystem of Arduino-compatible boards and interface units, and to a novice it’s all a bit overwhelming. I am that novice. Indeed, the list of Arduino projects I’ve completed looks like this:
- [insert list of future projects here]
However, awareness of what’s possible expands one’s set of available tools, and Arduino feels like the sort of thing I might, at some point, find useful. So every now and then I tinker a little. My tentative, toe-in-the-water approach to Arduino goes like this:
Technically, I’ve had an Arduino for a few years, though I’ve done very little with it. We’ll come back to that, because the impetus for this latest endeavour was a completely different approach being exhibited by Cefn Hoile as ‘Shrimping It.’ Cefn’s Shrimp is an absolutely bare-bones basic Arduino compatible:
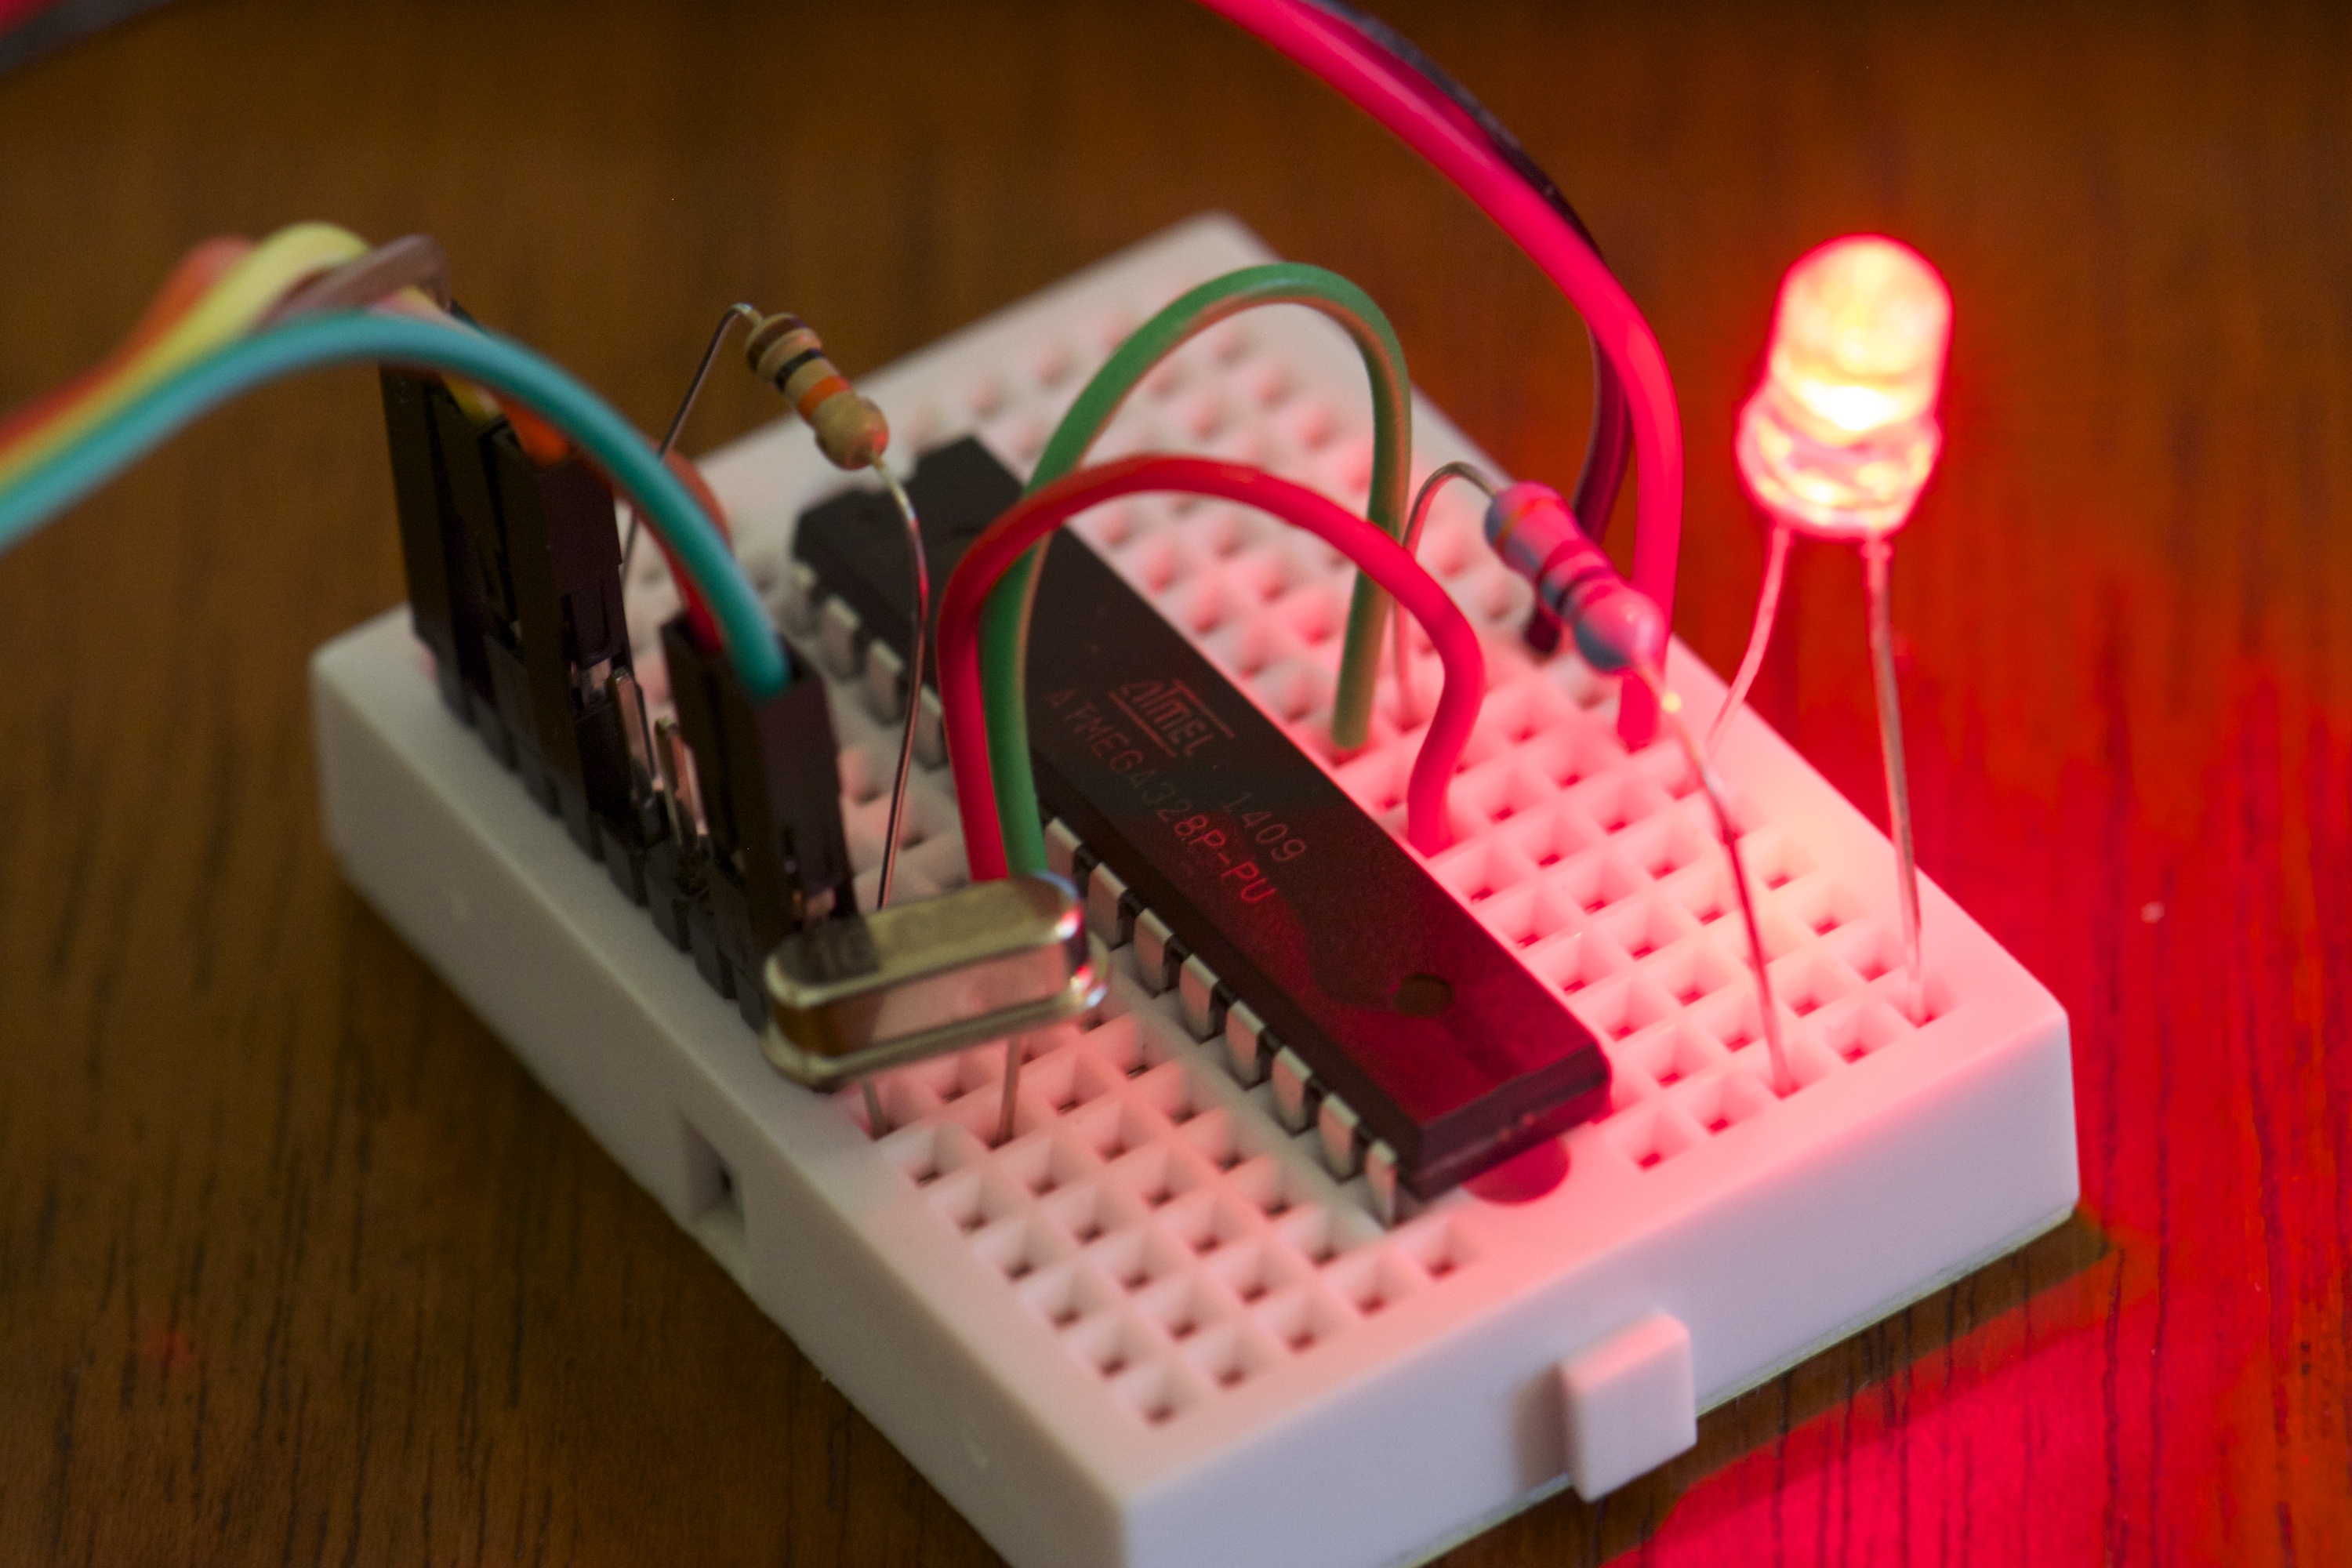
There’s something glorious about this. The chip is the microcontroller, set up with the Arduino bootloader and ready to take your code. The silver lozenge provides the 16MHz oscillator it requires, and the resistor on the left (along with a capacitor, slightly hidden) pulls up the startup pin so the thing knows to boot. To the right of the photo, an LED and series resistor, and power is coming in over the red and black leads which head out of the top of frame.
That’s it. That’s the whole thing. Well, there’s a modest cheat: the flurry of leads heading off to the left end in a USB interface, which allows you to write your code to the Shrimp. But once that’s done you can yank all those leads.
There’s something tremendously satisfying about putting all this together for yourself. It’s not that a conventional Arduino is particularly complex, it’s that it’s effectively a black box. Sure, it does a bunch of other stuff – power regulation, on-board USB, I think there’s some input protection, and so on – but look:
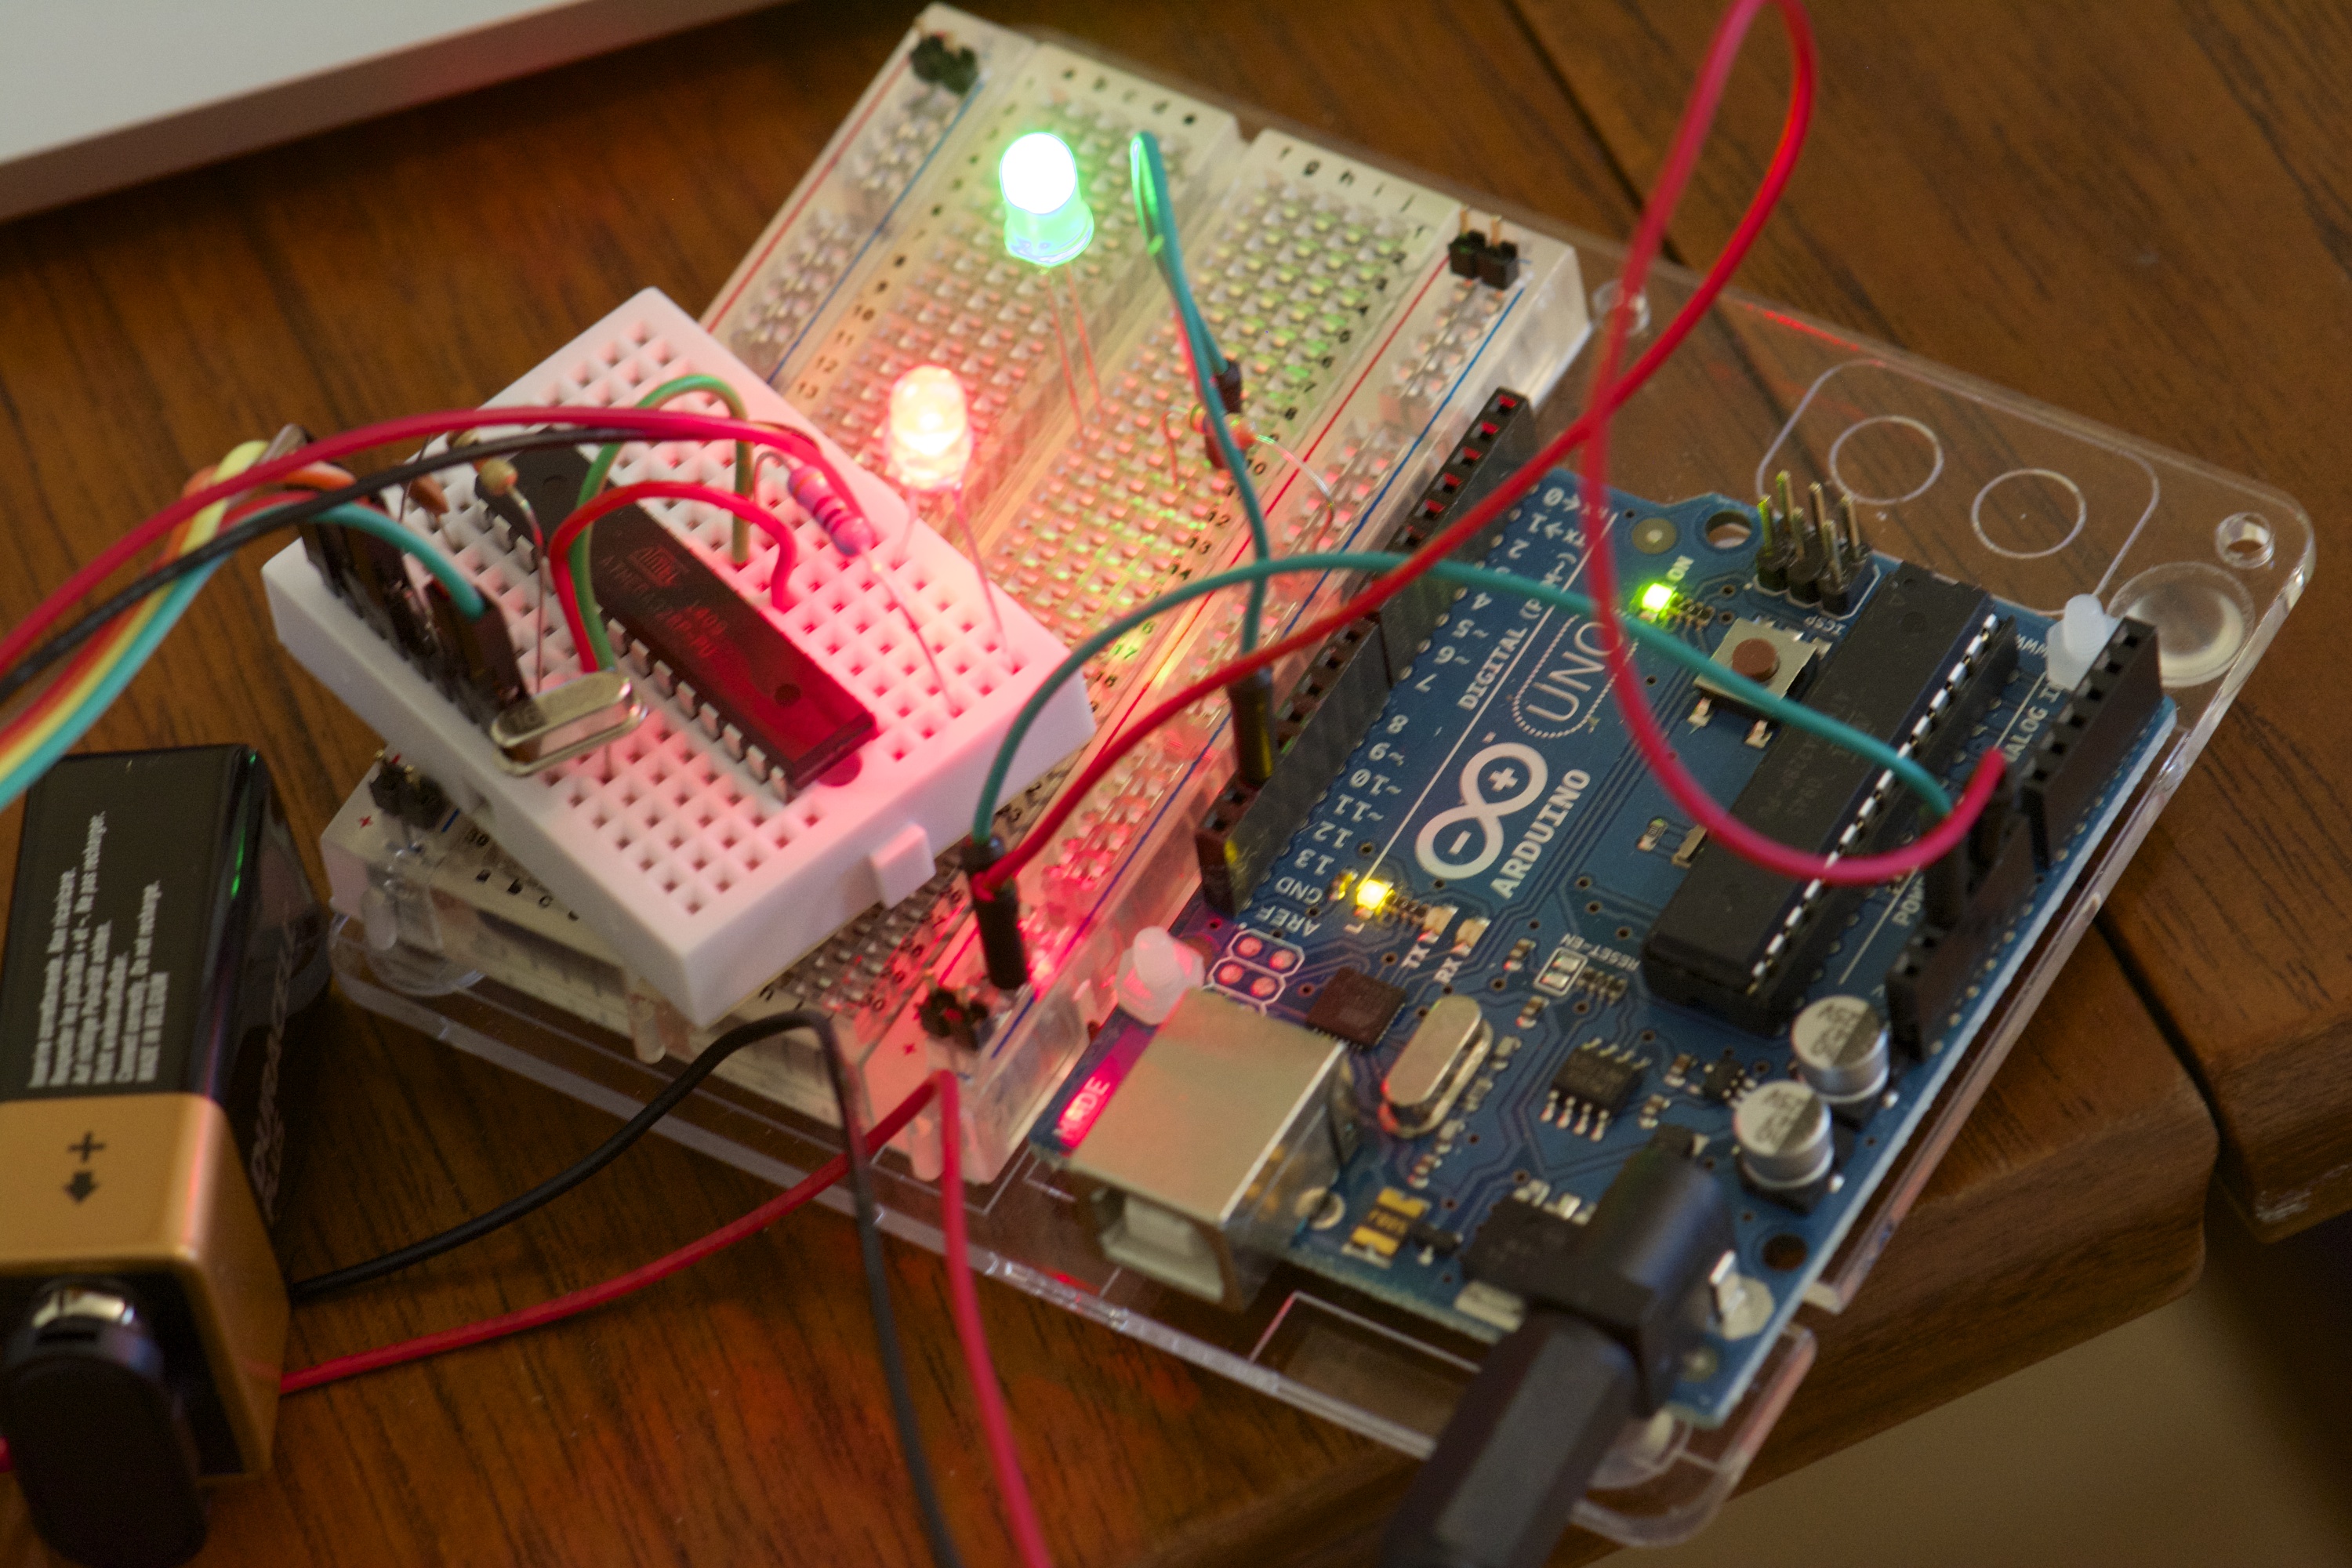
The shrimp on the white breadboard is doing exactly the same thing as the blue Arduino Uno.
Cefn sells Shrimp kits for around £4, plus a pound or two for the breadboard and a couple of quid for the USB programmers. The Arduino Uno sells for about £20. Also in Cefn’s store are Shrimp expansion kits, which are rather appealing. Here he is modelling a persistence of vision LED message flasher:

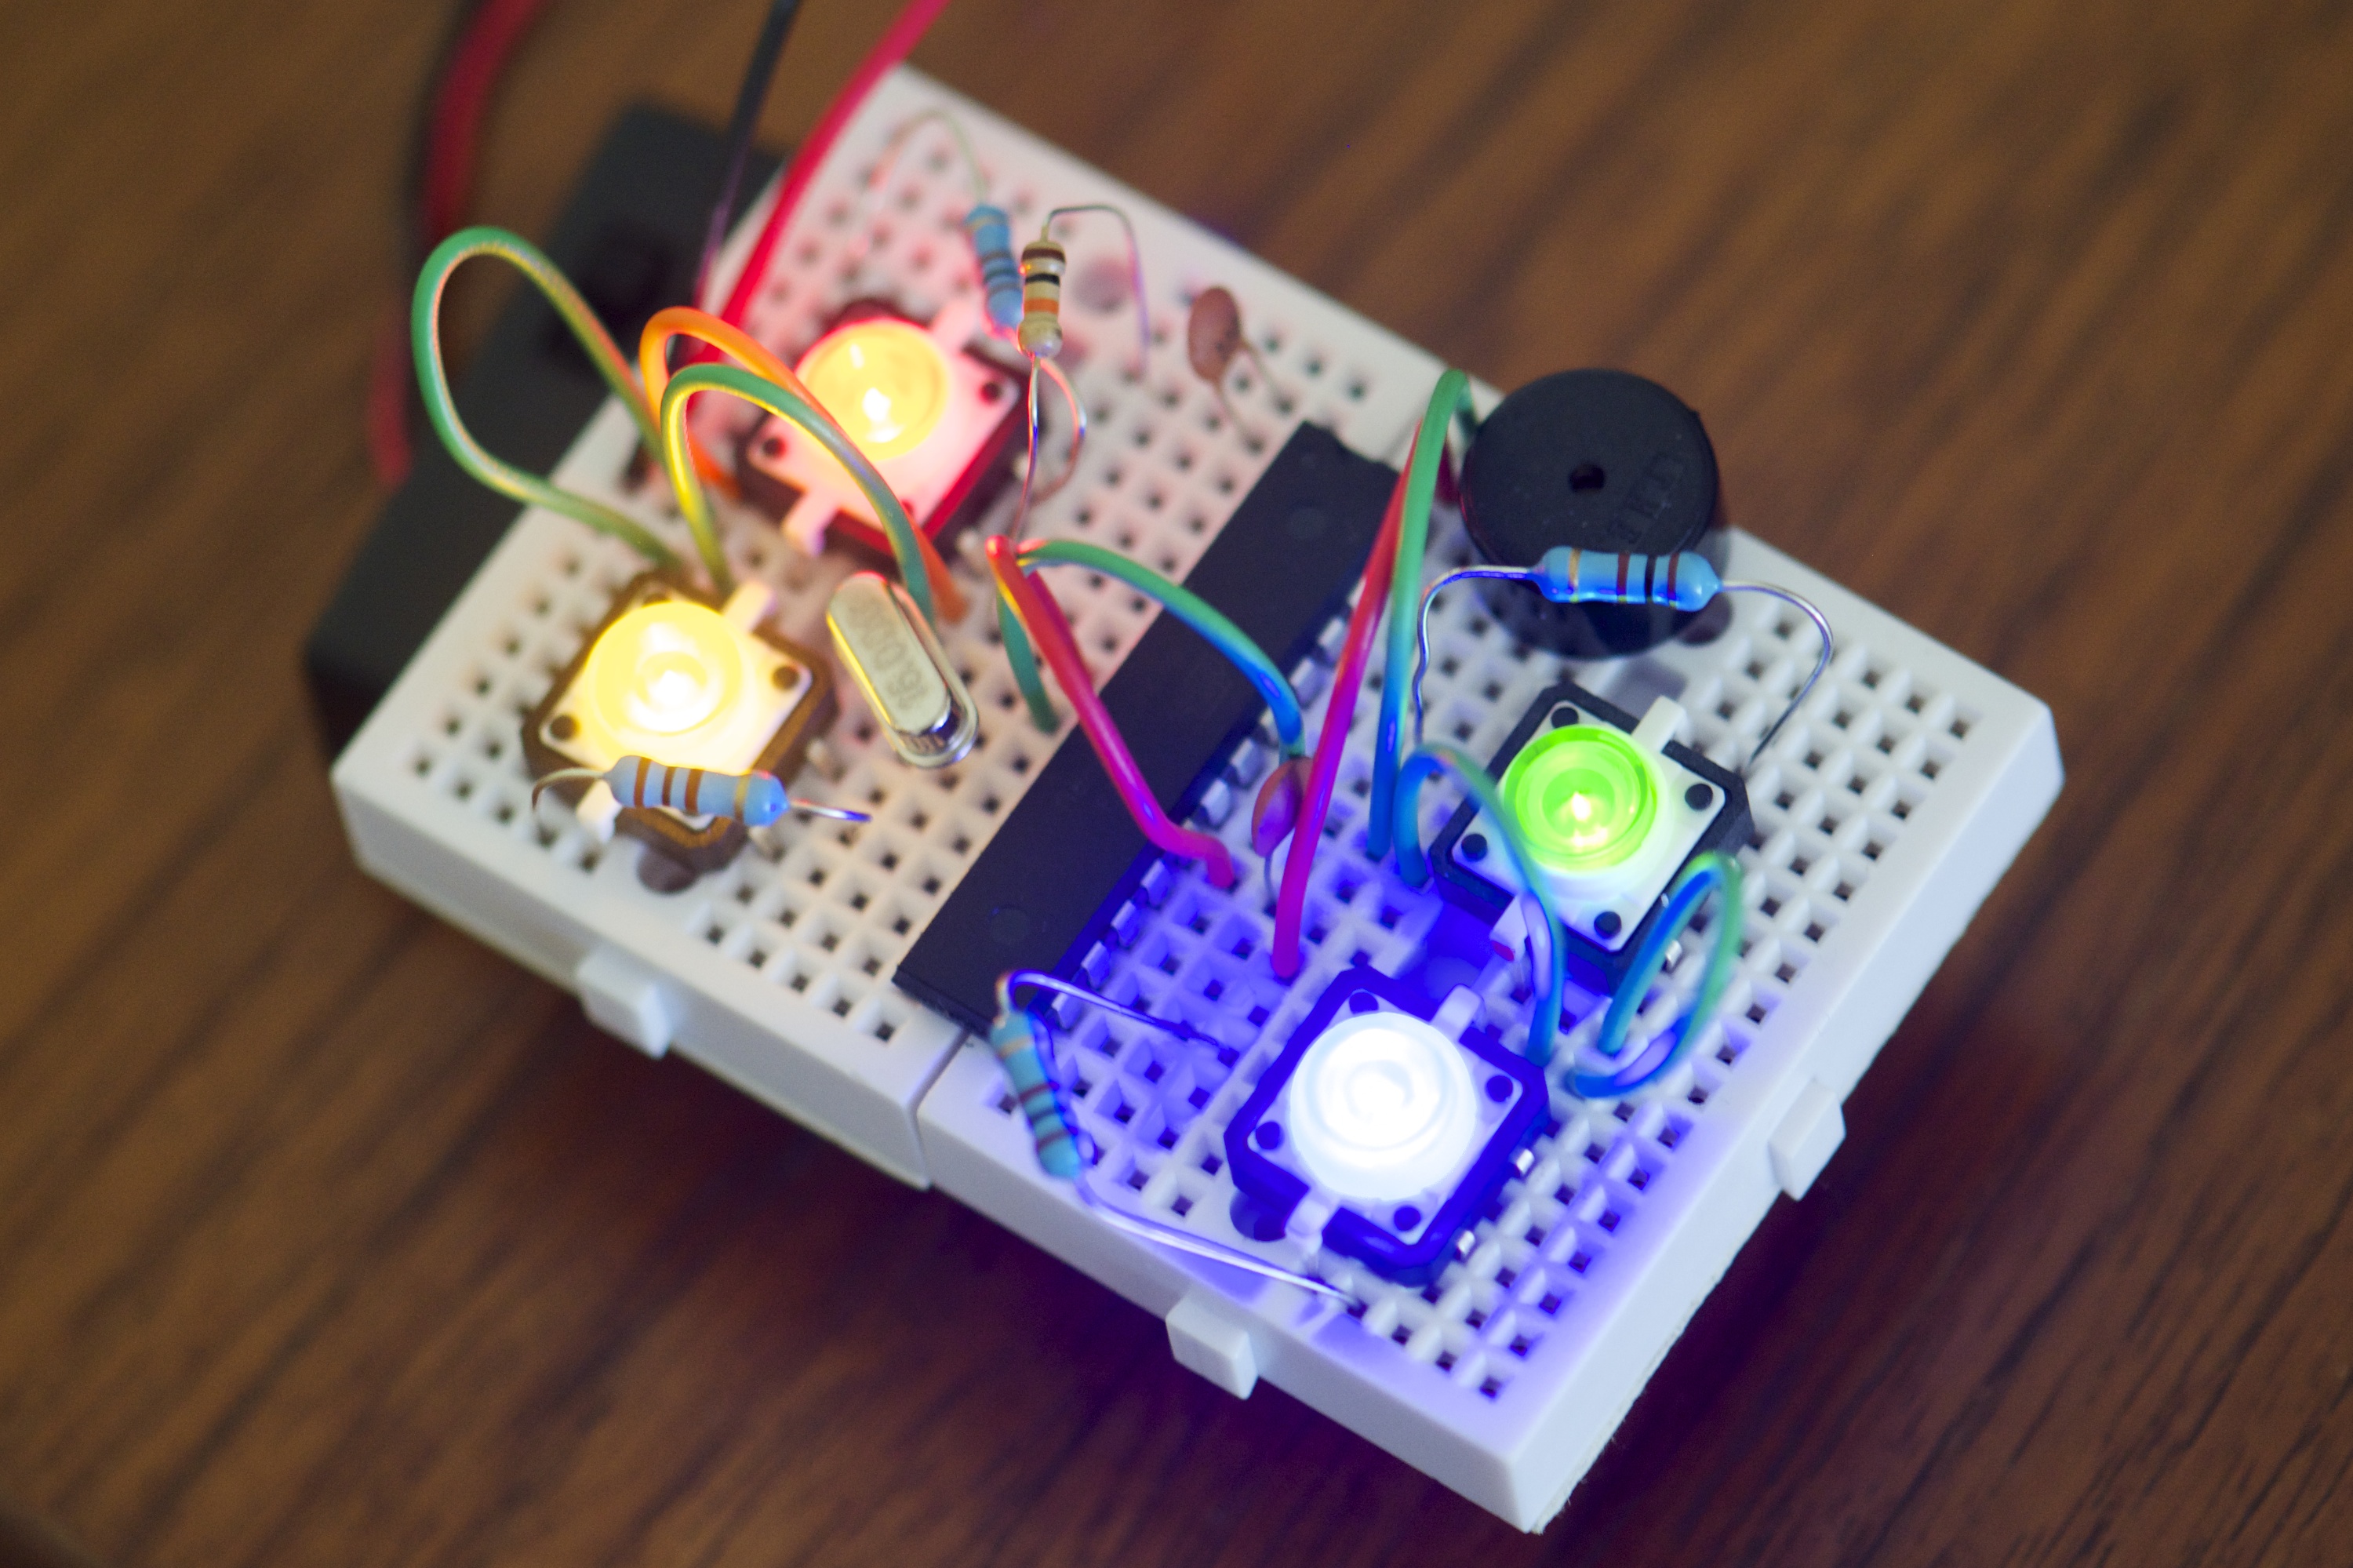
…but I plumped for a neat little Simon-like memory game kit:
Now, this passes one of my basic tests, which roughly speaking goes like this:
Is that something I’d like to have?
My problem – and I suspect I’m not alone in this – is that I’m not a huge fan of technical exercises. Maybe they’re fine for formal education, but for hobby stuff I’m far too shallow for dry tutorials. I need to be tempted a little more with something that appeals. The Shrimp memory game kit is about the simplest Arduino project I’ve seen which passes that test.
I enjoyed putting the thing together, and I even enjoyed a little hardware debugging (the buttons are fiddly to seat, but actually the biggest problem I had was getting the chip to seat correctly. It powered up and ran OK, but not all the button pins were working. When it all sprang to life correctly I had that familiar buzz of ‘Hey cool! I made this!’ It’s tremendously gratifying.
Where the wheels come off a little, for me, is in the code. Arduino programming is closely related to the C-like Processing language, which to my mind is under-rated in education circles. It’s pretty readable, but Arduino ‘sketches’ (I’ve no idea why they’re called that, just roll with it) seem to get unwieldy, fast. The memory game code is highly-polished, but it weighs in around 400 lines and while it’s mostly well-commented, it’s a bit daunting for a newcomer to wade into.
…and that’s the rub, really. It’s hardly the fault of the Shrimping It team that achieving something appealing requires a significant investment of knowledge and code. That’s the nature of programming, but climbing that learning curve is a challenge for newcomers.
So for me, it’s probably back to my first Arduino, which came with Oomlout’s excellent ARDX ‘experimenters kit’:
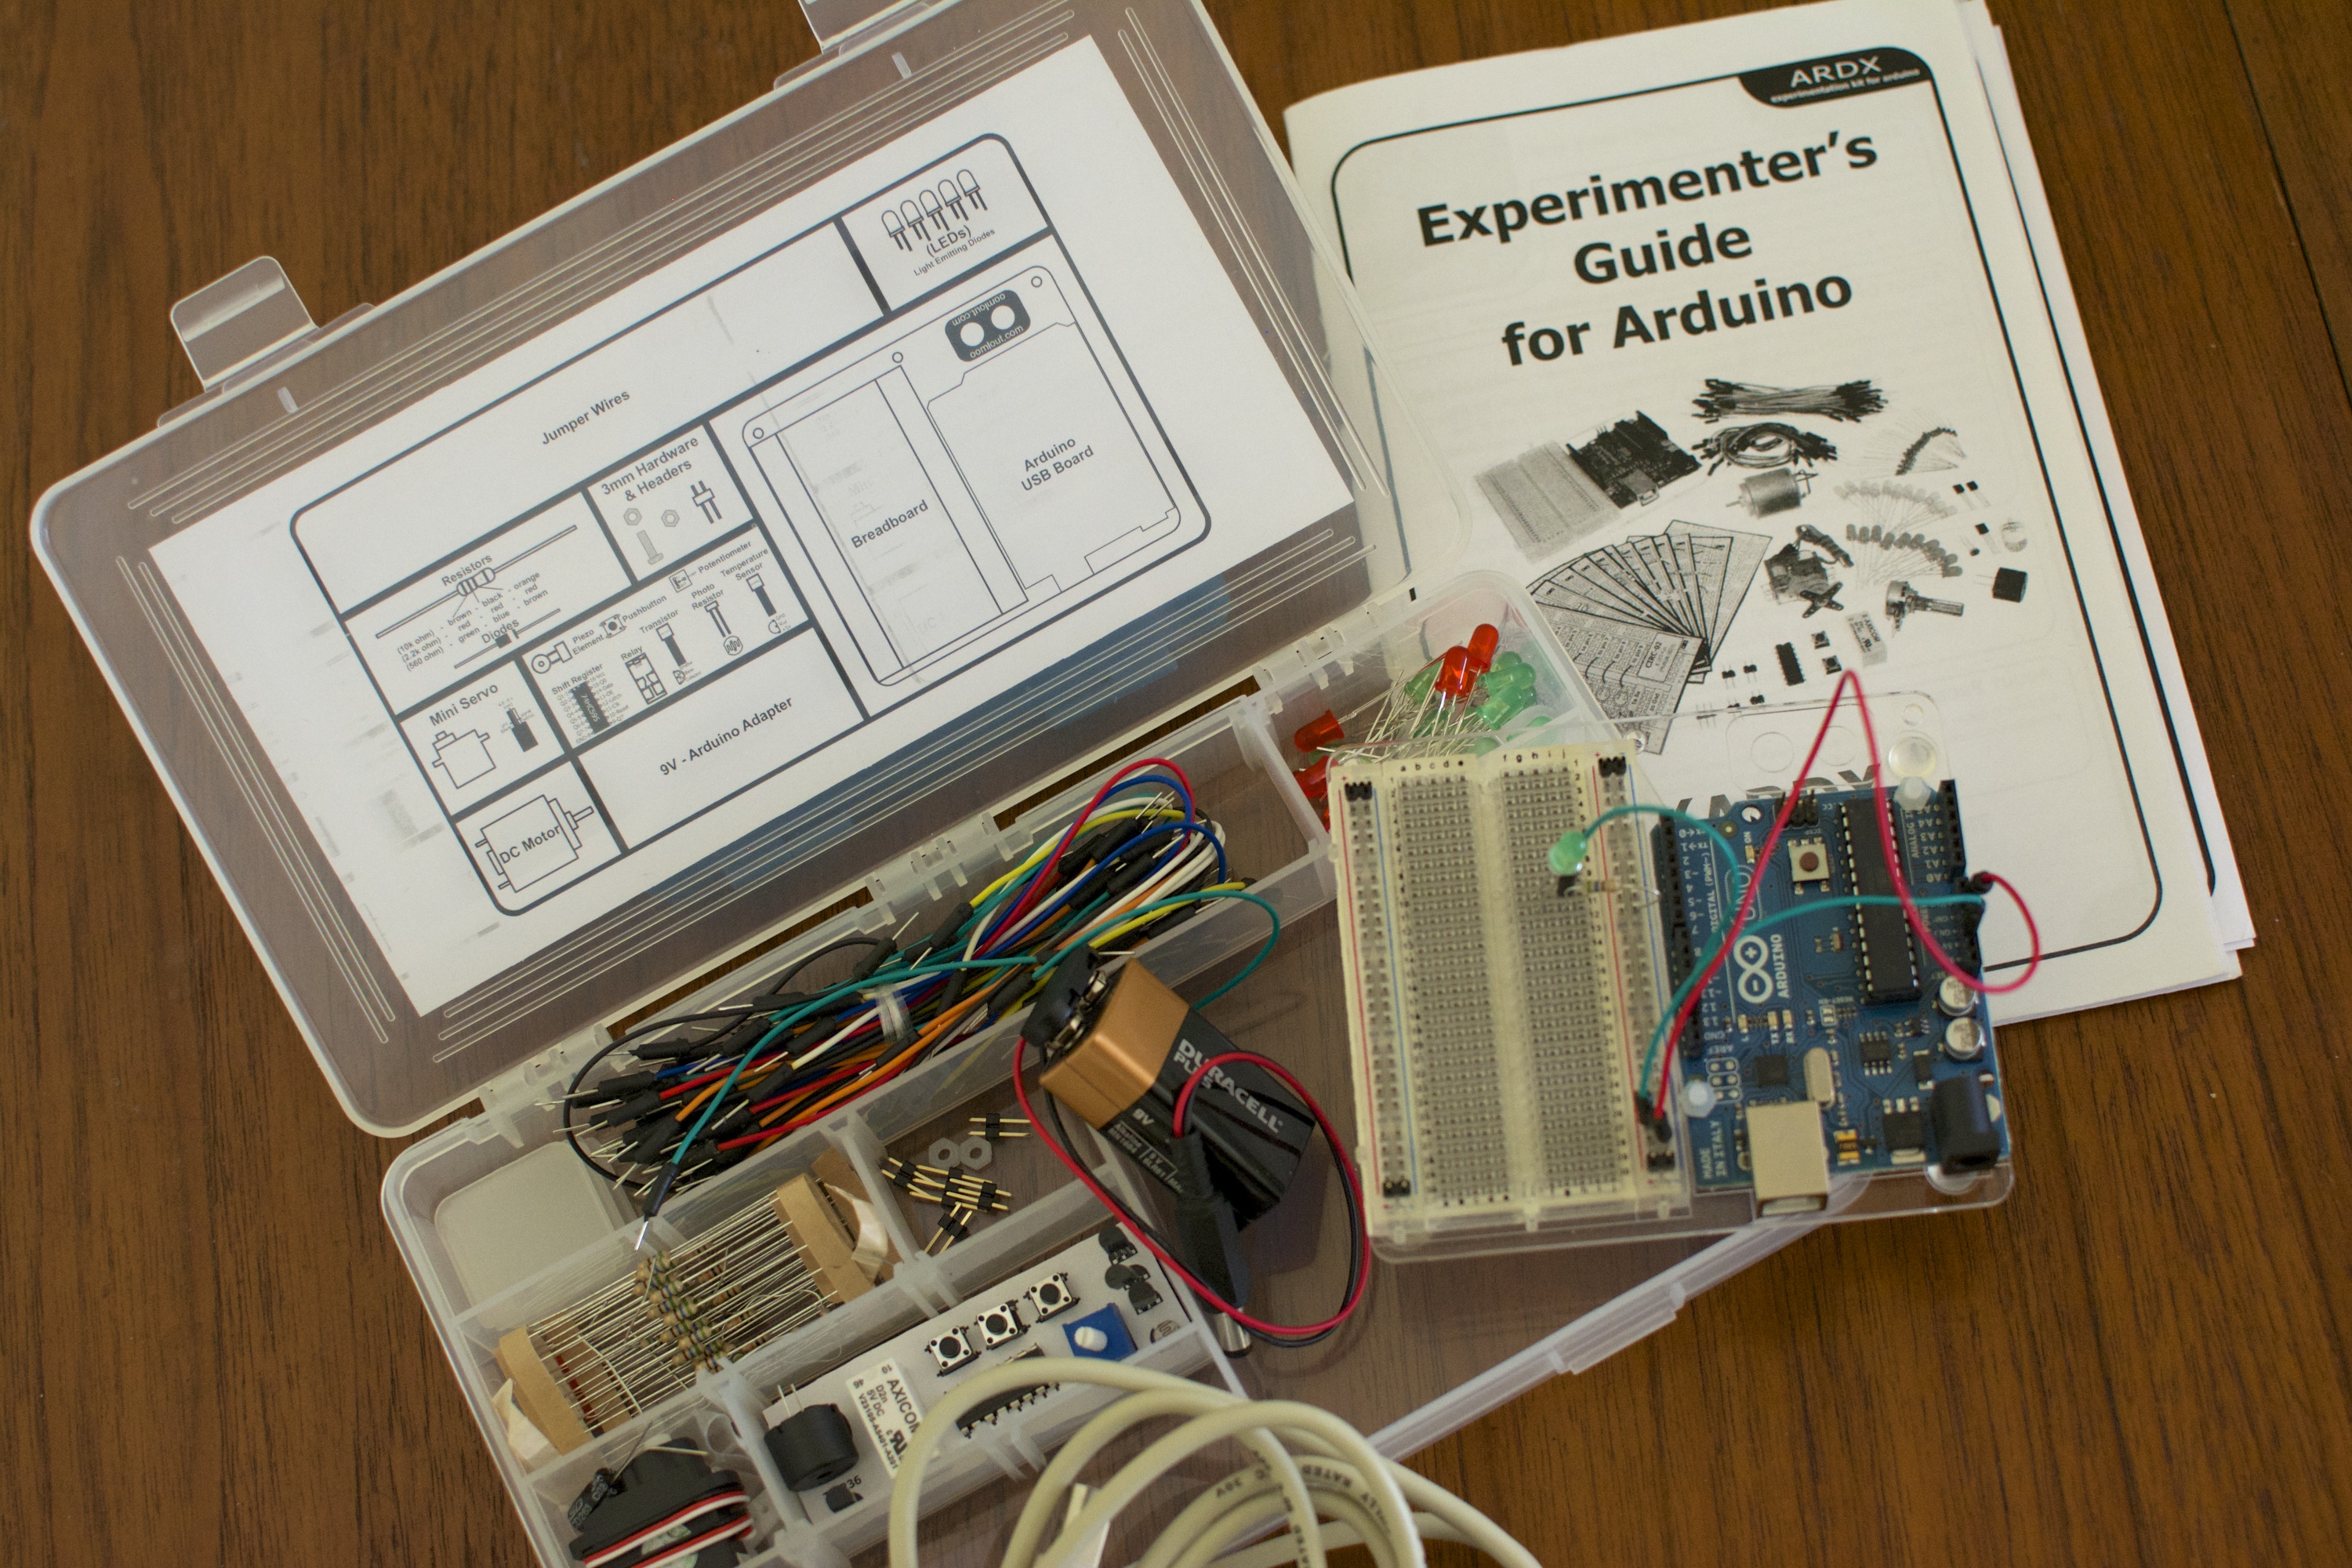
This is a nicely-presented box of components and a well-planned tutorial course which introduces their use, building your skills as it goes. It’s clear, well-paced, and … yeah, it’s back to technical exercises to make servos wiggle, or LEDs flash.
I’m left with the choice of bringing my own tutorial or bringing my own motivation. Neither route feels straightforward. Which, to be clear, is the fault of neither Shrimping It nor Oomlout: they’re both making great products which sell at good prices. My problem is that neither is tailored to my situation.
…and this, of course, is the challenge facing the Raspberry Pi folks, not to mention the Computer Science GCSE. Maybe I’m hyper-sensitive to motivation – a key breakthrough when we were making the children’s cardboard engineering TV show The Big Bang was starting with games and toys that were immediately appealing – but it doesn’t feel to me as if anyone’s really cracked this yet.
Hardware and software have never been more accessible and affordable. But we still need to work out why they’re truly compelling, and articulate that for people at all levels.
One thought on “Arduino: first steps”