All posts by Alom Shaha

Magical Balancing Can

I suspect many of you who watch the above video will know exactly how it’s done but it’s not immediately apparent to everyone, especially if you choose to present it in a way that isn’t quite honest about what’s going on.

I use this demo in my teaching to introduce the idea that an object will topple over if the line of action of its weight lies outside its base. I usually present it as a challenge: I start off with two identical (apparently) empty drink cans on my desk (yes, I know the ones in the video have slightly different designs). I offer one of the cans to a student and challenge him or her to balance it on the edge of the base. I tell them I’ll try to do the same with the other can. I make a big show of concentrating, then reveal that I have managed to make my can balance while the student’s can keeps falling over (this usually gets a gasp of approval – as I think the video shows, the can balanced on its edge looks quite disconcerting). After the initial surprise at my being able to balance the can, the students usually guess that something’s not quite right.

I think this demo works well presented as a “magic trick” because it captures students’ attention and provokes the question “what’s going on?” or “how does that work?” and that’s when the discussion begins…

UPDATE: I’ve had a couple of responses to this post on Twitter and elsewhere. I should perhaps have said that using this type of approach may not be suitable for all teachers – you have to be comfortable with the way you present a demo to a class and if showmanship isn’t your thing there’s no point forcing it (although I’d argue that this particular demo requires very little in the way of showmanship to present as a “magic” trick). We touch on this issue in our forthcoming film Demo: The Movie.

A teacher contacted me saying it was a shame I didn’t provide an explanation as it would make it easier for teachers to do the demo if they knew exactly how to do it. So, here’s the trick: place a little water in the can you want to balance before your lesson. The easiest way to judge the correct amount of water is to hold the can in the balanced position then pour water into the can until you feel it just balances. Alternatively, you could pour in liquid wax and let that set so that you have a pre-prepared can that you can keep in the equipment cupboard.

Modelling digestion using visking tubing

This is the second Biology film we’ve made as part of the “Get, Set, Demonstrate” project. One of the films we were asked to look at was “Making Poo: The Digestive System” but we felt that this was not what we would strictly call a “demonstration” of digestion (since no actual digestion takes place), but rather an illustration of the process. Instead, we chose to make a film about using Visking tubing to model digestion and use it to explore the reasons why you might choose to carry out a demonstration of an activity which can be (and often is) done as a class practical.


Get Set Demonstrate logoThis film was produced for the Get Set Demonstrate project. Click through for teaching notes, and take the pledge to perform a demonstration to your students on Demo Day, 20th March 2014.

Pearls in Air / Pearls of Water

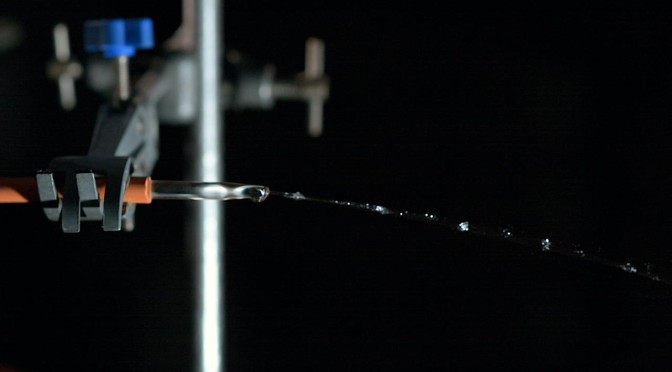
This is an example of a demonstration where video doesn’t come close to capturing the awesomeness of seeing it for real. I love seeing students have the same reaction to it as I did when I first saw it – one of joyful wonder at seeing something which appears to defy the laws of physics, of seeing something impossible.

Pearls in air can be a tricky demonstration to set up and I have to confess that, until making this film, I’d never had to set it up myself as I’ve always worked in schools where the physics technician did it for me. The version shown in the video isn’t perfect – it’s possible to get a better looking stream of “pearls”, but I’m OK with that because it’s honest in its depiction of what can be achieved in a limited amount of time with limited resources.

I find this demo incredibly useful for teaching about projectile motion and it’s a nice companion to the monkey and hunter demo which I think was the first demo film Jonathan and I made together.


Get Set Demonstrate logoThis film was produced for the Get Set Demonstrate project. Click through for teaching notes, and take the pledge to perform a demonstration to your students on Demo Day, 20th March 2014.

Pluck Dissection

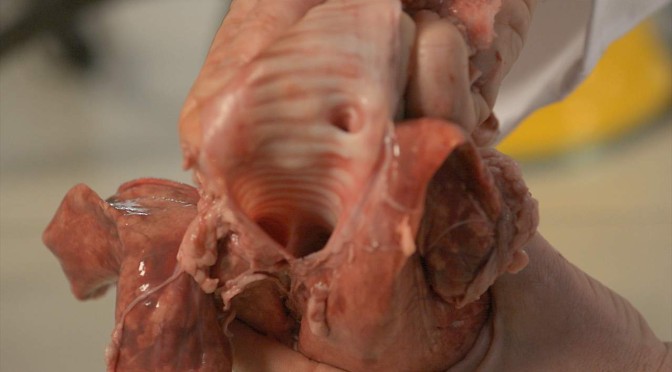
As a Physics teacher, I’ve got a long list of classic demonstrations at my disposal for use in teaching everything from pressure to electricity to conservation of energy. I’ve had to teach some Biology in the past and I think it’s fair to say that Biologists are not so well resourced when it comes to demonstrations.

A large part of the reason for doing demonstrations in class, I think, is to get our students to look closely at the world, to really observe it in detail. In Biology, that means taking a close look at living things and the components of which they’re made. This video is unlike any of the other demonstration films we’ve made so far, but it was one of the most interesting I’ve worked on – I came away convinced that if I teach Biology again, I’d definitely make more use of dissection as a teaching tool.


Get Set Demonstrate logoThis film was produced for the Get Set Demonstrate project. Click through for teaching notes, and take the pledge to perform a demonstration to your students on Demo Day, 20th March 2014.

Collapsing Can

The collapsing can demo is one I loved seeing for the first time when I was at school, although my teacher used a tin with a screwed down lid which took a little more time to cool down. In some ways I prefer the version using a can with a screw lid because the additional waiting time makes for an even more dramatic “collapse”. Doing the demo with a drink can is of course far cheaper (and I think, more reliable as it doesn’t depend on the lid being screwed down properly) and I suspect this is why the approach we use in our video has become far more widespread in schools.

I like the demo a lot but, as I hope we’ve managed to convey in the video, I think we need to be careful how and why we use it in our lessons. This is a really fantastic demo for using the Predict, Observe, Explain (POE) approach as the explanation of what’s going on is not entirely straightforward – there are a couple of things relating to the behaviour of particles and the action of forces that need to be considered and this can lead to some really interesting discussion with students, providing they’re familiar with the relevant concepts.

We’ve suggested in our video that the collapsing can demo can be used in conjunction with another demo, as a way of “scaffolding” (I really hope I’ve used that term correctly – I think this may be the first time I’ve used it in writing in this context).

Once you’ve done the demo live in class, you’ve got the perfect justification for showing your students this video of a rather more spectacular demonstration of the same physics at work:


Get Set Demonstrate logoThis film was produced for the Get Set Demonstrate project. Click through for teaching notes, and take the pledge to perform a demonstration to your students on Demo Day, 20th March 2014.

Magic in the classroom: The Iodine Clock

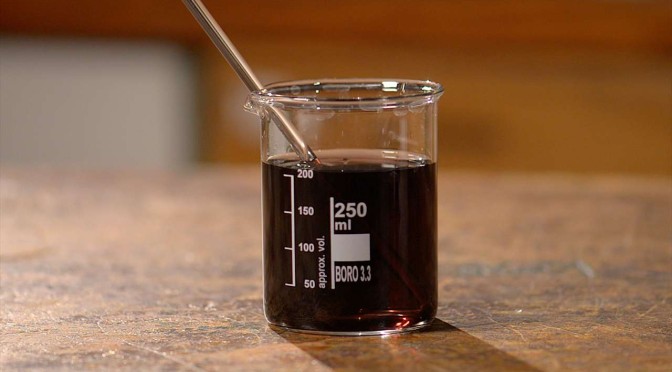
As well as being a science geek, I’m a magic geek. I’m not sure if anyone’s done the research on this, but I suspect those are two groups of people where there’s a significant overlap. I’ve got an entire live science show I do based around my love of magic and my somewhat lame attempts to become a magician and I include this demonstration as a highlight in the show. Like many of the demonstrations we’ve filmed, I don’t think video can do justice to how amazing it is to see in real life – it appears to be genuinely magical and always gets an “ooh” from the audience.

I’ve used the iodine clock in class purely for the effect it has of enthralling my students, but, as I hope the video shows, it can be used to achieve particular learning objectives. Mind you, I hope it’s clear that we at sciencedemo.org think “enthusing students” can be a sufficient justification for using a particular demo, if you’re going to take that enthusiasm and use it to help students get more out of your science lessons in general.


Get Set Demonstrate logoThis film was produced for the Get Set Demonstrate project. Click through for teaching notes, and take the pledge to perform a demonstration to your students on Demo Day, 20th March 2014.

Acoustic levitation using standing waves

Most physics teachers will have to demonstrate standing waves at some point in the school year and there are a number of standard demonstrations which can be done with school lab equipment. When teaching about them, I also show videos of standing waves I can’t recreate in the classroom and the one above is a lovely addition to my resources for this topic. This video also reminded me of a piece of art I saw at the Tate Modern several years ago – Kinetic Construction (Standing Wave) – which was the first time I saw a Physics demonstration presented as “art”.

Electric Semolina

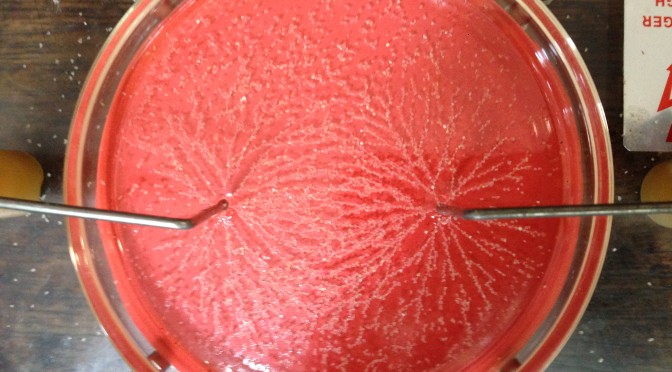
I hope that most school children get to see that sprinkling iron filings around a bar magnet produces a pattern which shows the shape of the magnetic field around the magnet. It’s a very simple, yet useful, way of making something invisible, visible. What many school children won’t get to see is that you can do something very similar with electric fields, using semolina instead of iron filings. The picture above is from a demonstration I showed my year 13 (A-level) students last week – the instructions for how to set it up can be found at the Practical Physics site.

A tip: it’s lovely for the students to see this for themselves, but the apparatus is tiny so use a camera to project it onto your whiteboard as well. I forgot to take my webcam into school so I used my phone to take a photo and put that up on the whiteboard so we could look at the demonstration closely and discuss it. I encouraged my students to take photos too, as I did when we investigated magnetic fields – I’m not convinced getting students to draw what they see is terribly useful in this case. What do you think?

“Doing” science is not the same as learning science

The Council for Science and Technology (CST) says that without practical lessons, science in schools is “like studying literature without reading books”. I’m not sure that’s true. I suspect, if I had to, I could teach my students “science” without ever giving them a single practical lesson, provided I was allowed to use demonstrations and videos. As long as I was allowed to show my student the phenomena I’m trying to get them to understand, I think I could teach a meaningful science course and that they could go on to become scientists if that’s what they wanted to do. Sure, it wouldn’t be the most complete or satisfying way of teaching science, but it would be better than no science education at all and, dare I say it, it might even be better than some approaches to science teaching which include lots of practical work. The CST’s analogy is inaccurate – practical work is not as central to the teaching of science as reading books is to the teaching of literature, just ask any GCSE student who has managed to pass their science exams by simply reading the textbook.

I’ve written about practical work before and even made a short film about it, so I won’t re-hash those arguments here except to say that it’s not unreasonable to assume that “doing” science (it’s debatable that this is what really happens in practical science lessons) might be a pretty good way of learning science. However, we should be aware that this is, as leading education researcher Jonathan Osborne puts it, a “dangerous assumption”. According to Osborne, the role of science education is:

To construct in the young student a deep understanding of a body of existing knowledge. In doing so, it needs to show why this knowledge is valued; that it was hard won; and that science is a creative process – that it offers you the opportunity to free yourself from the shackles of received wisdom by creating your own knowledge. However, that is not the same as the doing of science and there is a clear line in the sand that needs to be drawn between the two activities.
(E-NARST News, July 2007, from conference speech)

As good science teachers we should be wary of people who over-emphasise the importance or benefits of practical work in science teaching and we should look to the research and evidence on how to improve our practice to get the most effective learning for our students. Science is about ideas. We should make sure our ideas about science education are as sound as the ones we attempt to teach.